Chapter 19 CC18
Chapter 19 - Pacing
Rhythm is an essential consideration in the production of motion graphics. One of the most common and simple time signatures is 4/4, where four beats are evenly heard over one bar of music and each note is one beat. House Music has a 4/4 beat. This method of counting time can be applied to animation. In House music, the beat is counted in cycles of eight. The rhythm is established and peaks at the fourth beat. It reduces in the next four beats, in preparation for the next set of eight beats. One of the key concepts in understanding animation is visualizing time. Whether you are keeping track of the musical score or graphic frames on a timeline, counting time is important and "seeing" the count is a necessity.
Early experimental animation can be drawn upon as an example of seeing time kept with abstract, basic shapes. This is Oscar Fischinger's 1927 animation. (example) Consider formal design properties of balance and movement while watching this animation. The work we will be doing is more like his later work, "Early Abstractions" (1946 - 57). Harry Smith's homage to Fischinger remains abstract, though it is even more layered and complicated. Notice the color harmonies and formal balance. Balance changes over time, shapes change in size and transparency. Rhythm is used to create a sense of predictability within the abstraction.
In the following exercises, we will apply some of these core principles to our basic Flash animations.
Exercise 1: Visualizing time, keyframes, shape tween
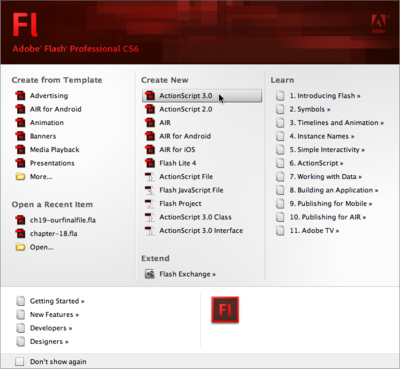
1. Open Flash and notice that the interface is similar to Dreamweaver. Click on the button for new file using Actionscript 3.0.
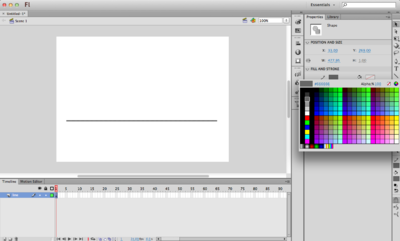
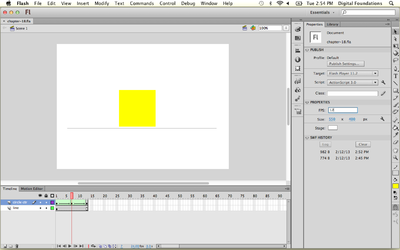
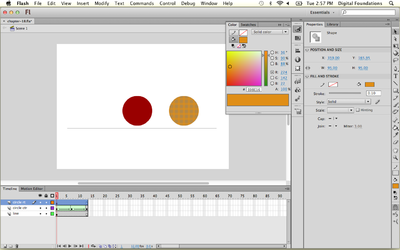
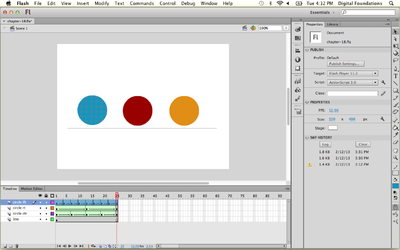
2. Inside Flash you will see a Tool Palette, Color Picker, Properties and various other palettes that can be opened and closed from the Window Menu. The key difference between Flash and Dreamweaver is the timeline and playhead. The timeline is located at the top of the screen. By default, there is one empty layer and one empty frame. Double-click on "Layer 1" and name it "line." In Flash, all of the art is made or placed on the Stage or Workspace while all of the instructions about how the art is animated is inserted into frames on the Timeline. Draw a grey line in the bottom one-third of the stage. This line will serve as a baseline. Notice in the image below that the line is gray because the color selected for "Stroke color" is the gray hex value, #666666.
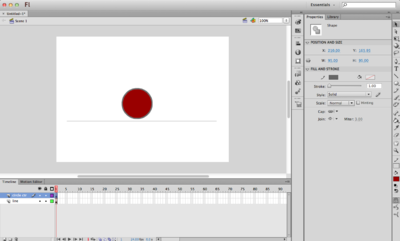
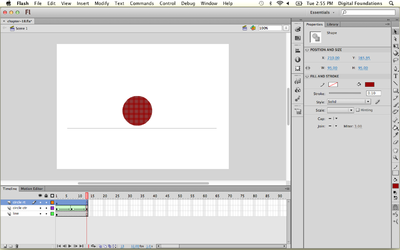
3. Add a new layer by clicking on the Insert Layer button towards the bottom left of the Timeline Palette. Name it "circle ctr." While the new layer is active (highlighted) draw a circle using the Oval Tool in the Stage. Position the circle above the center of the baseline. The stroke of a shape is the line around the outside. The fill is the color inside the outline of the shape.
| Tip: Like all Creative Suite applications, the SHFT key is used to constrain proportions. Hold SHFT when using the oval tool to create a perfectly proportioned circle. |
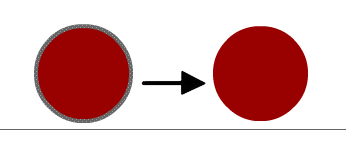
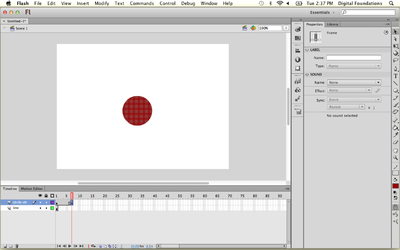
4. Use the Selection Tool to click on the stroke around the circle (in our example, the stroke is gray and the fill is dark red). Press DEL on the keypad so the shape is made by a fill with no stroke.
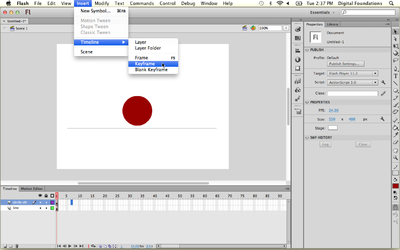
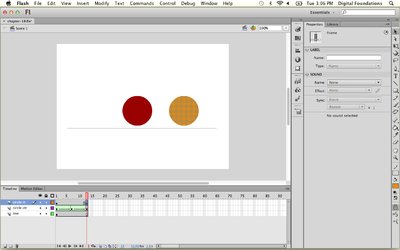
5. In the Timeline, click on frame 7 then click Insert > Timeline > Keyframe. Keyframes are points in time where something on the Stage changes. We often use keyframes to add or modify content. "Tweening" is animation terminology for drawing the shapes between two keyframes so that it seems as if one morphs into another. Tweening is often used to create motion. Flash creates both shape and motion tweens. We will explore shape tweens in this chapter and motion tweens.
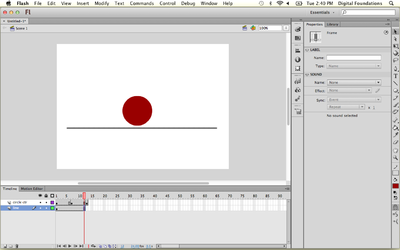
6. Notice that a keyframe is indicated in the Timeline by a black circle. Frames between keyframes are gray. The last frame before a keyframe is a white rectangle. The playback head is a red rectangle over the frame number indicator at the top of the Timeline, with an accompanying red line stretched through all layers. At the bottom of the Timeline Palette, the frame number that the Playback Head rests upon is reported (in this instance, the number 7).
7. Create another keyframe on frame 13.
8. Add frames for the layer containing the baseline. We do not need to add another keyframe, as the baseline will not change throughout the animation. Click on frame 12 on the "line" layer and select Insert > Timeline > Frame.
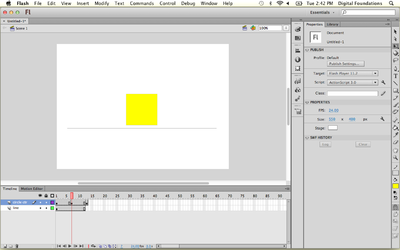
9. Click on frame 7 on the "circle ctr" layer then use the Rectangle Tool to draw a square. Notice that we set the stroke color to none. You can use the same color for the square as you used for the circle, or you can try a different hue.
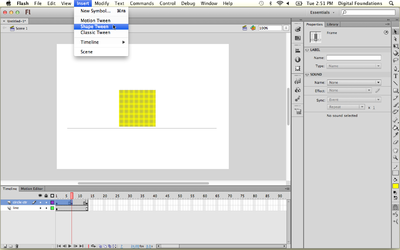
10. In the Timeline, click once on frame 1, hold SHFT and click once on frame 7. This selects frames 1-7. Now click Insert > Shape Tween. Flash will construct all of the frames between the keyframes to animate the content.
11. In Flash, the master file is the .FLA file. Click File > Save As and save the .FLA file if you haven't done this already.
12. View or "Test" the animation by pressing CMD+RETURN or use Control > Test Movie > in Flash Professional. Testing the movie creates a .SWF file, which is a playable file understood in Flash and web browsers.
Exercise 2: Modifying the frame rate adjusts the speed of the beat
The animation created in Exercise 1 is exactly one second long. The frame rate determines the length of time that each frame is played. Dividing the number of frames used in the animation (the number of the last frame - 1) by the frame rate results in the duration of the animation. In Exercise 1, the frame rate is 12 frames per second (fps), so (13 - 1)/12 = 1 second. Since the frame rate is the same for the entire timeline, it is a property of the document. In this exercise we will modify the frame rate by using the Properties Palette.
1. Click on the stage, and notice the properties displayed in the Properties Palette near the bottom of the screen. These properties are specific to the stage. If you click on the timeline, you will see different properties. Use the box next to "Frame rate" to change the rate to 24 fps. Doubling the frame rate will make the animation move twice as fast.
2. Play music while watching your animation. Try to synchronize the animation so it is in time with the music by adjusting the frame rate. With only 12 frames moving at 24 fps, the animation will loop twice in one second of time.
Exercise 3: Visualizing tempo
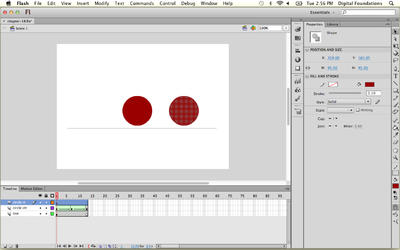
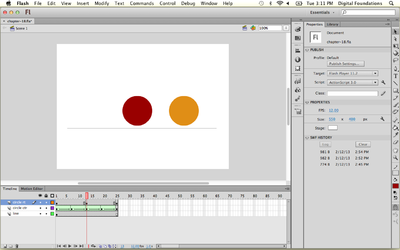
1. Click on the "circle ctr" layer then add a new layer above it. Name it "circle rt". Select the circle on the first layer, and copy it using Edit > Copy or CMD + C. Click on the first frame of the new layer and paste the circle using CMD + V.
2.Hold SHFT while clicking and dragging the new circle to the right of the first circle.
| Holding the Shift Key while dragging an object restricts the movement to 90 and 45 degrees. |
3. Click in the Color Palette to change the color of the new circle.
4. Insert a new keyframe at frame 13 on the "circle rt" layer. Click on frame 25 and use the key command (Function Key) F6 to add another keyframe.
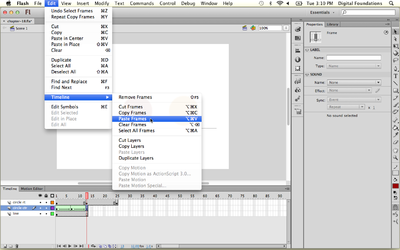
5. In order to see the original circle on the "circle ctr" layer after frame 13, we will duplicate the first 13 frames. Select the frames you want to copy, by clicking on frame 1 of the "circle ctr" layer and holding SHFT while clicking the 13th frame. Click Edit > Timeline > Copy Frames. Select the first destination frame, or frame 13, and click Edit > Timeline > Paste Frames. We are pasting on top of the second keyframe. On the "line" layer, click on frame 25 and use Function key F5 to insert frames, or Insert > Timeline > Frame.
There is a difference between Copy and Copy Frames. Edit > Copy will copy a shape or an object. Edit > Timeline > Copy Frames will copy the entire content of one or multiple frames.
| Key command: CMD+OPT+V is a shortcut for Edit > Timeline > Paste Frames. |
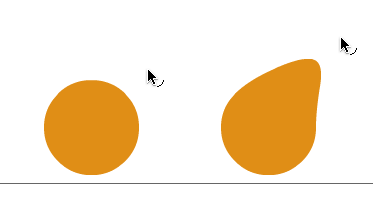
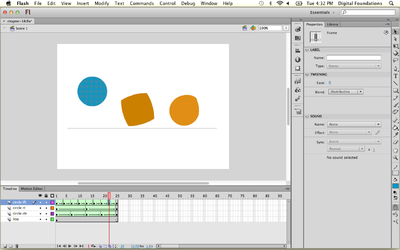
6. Click on frame 13 on the "circle rt" layer and mouse over the edge of the circle on the stage with the selection tool. The cursor changes into an arrow with a curved line. This symbol means that you can pull the edge of the circle to reshape it. Change the shape of the circle using this technique.
7. Select frames 1 through 13 on the "circle rt" layer and apply the Shape Tween in the Properties Palette.
8. Test the new animation (CMD + Enter) and notice that the new tween takes twice as long as the tween in the first circle to square animation. The tempo of the new tween is slower than the tempo of the first circle.
Exercise 4: Basic bouncing ball
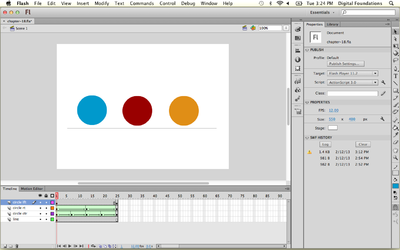
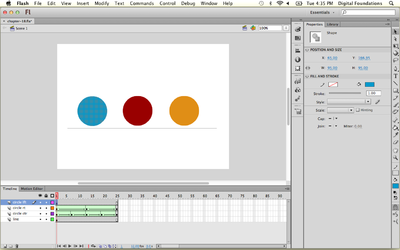
1. Repeat the first steps in Exercise 3 to create a new layer above "circle rt" called "circle lft." Add a third circle to the left of the original with a new hue.
2. This circle is going to have a shorter cycle than both of the other shapes. This will result in the fastest tempo. Add a new keyframe on this layer at frame 25 so the circle will end in the same position. When an animation is supposed to cycle seamlessly, a keyframe should be placed at the end of the layer holding the same content as the first frame.
3. Insert a new keyframe every three frames. In each keyframe, move the circle up or down with the Selection Tool.
We started on the second keyframe (frame 4) and used SHFT+Up Arrow three times (Shift + up + up + up) to move the circle 30 pixels higher than it's starting point. On the next keyframe, we used SHFT+Down Arrow. On the following keyframe, SHFT+Up Arrow four times. On frame 13, SHFT + Down Arrow. We repeated this pattern throughout the layer so the circle would look like a ball that bounces higher each time it hits the ground. 4. Create a shape tween between each keyframe.
5. Use CMD+return to watch the new animation.
