Chapter 19 CC18
Chapter 19 - Pacing
Rhythm is an essential consideration in the production of motion graphics. One of the most common and simple time signatures is 4/4, where four beats are evenly heard over one bar of music and each note is one beat. House Music has a 4/4 beat. This method of counting time can be applied to animation. In House music, the beat is counted in cycles of eight. The rhythm is established and peaks at the fourth beat. It reduces in the next four beats, in preparation for the next set of eight beats. One of the key concepts in understanding animation is visualizing time. Whether you are keeping track of the musical score or graphic frames on a timeline, counting time is important and "seeing" the count is a necessity.
Early experimental animation can be drawn upon as an example of seeing time kept with abstract, basic shapes. The work we will be doing is more like Oscar Fischinger's later work, "Early Abstractions" (1946 - 57). Harry Smith's homage to Fischinger remains abstract, though it is even more layered and complicated. Balance changes over time, shapes change in size and transparency. Rhythm is used to create a sense of predictability within the abstraction.
Exercise 1: Adding Sound Clip and Define Length of Clip
1. Open Adobe After Effects. Select “New Project…” in the startup menu.
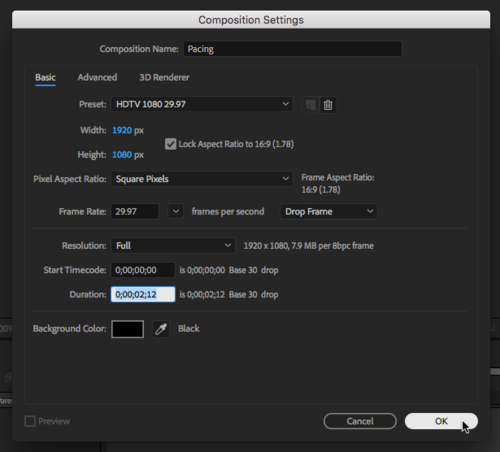
2. Select “New Composition.” Name the Composition “Pacing.” Make sure the width is set to 1920 px and the height is set to 1080 px. Set the frame rate by selecting 29.97 from the pull-down menu. Set the Duration to 2.12 seconds which is 0;00;02;12. This is because we will be using an audio file that is 2.12 seconds long. Press OK.
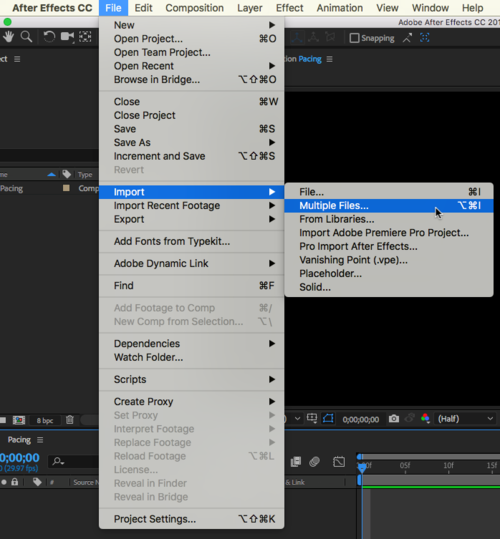
3. Import the sound clip and AI file using File > Import > Multiple Files…
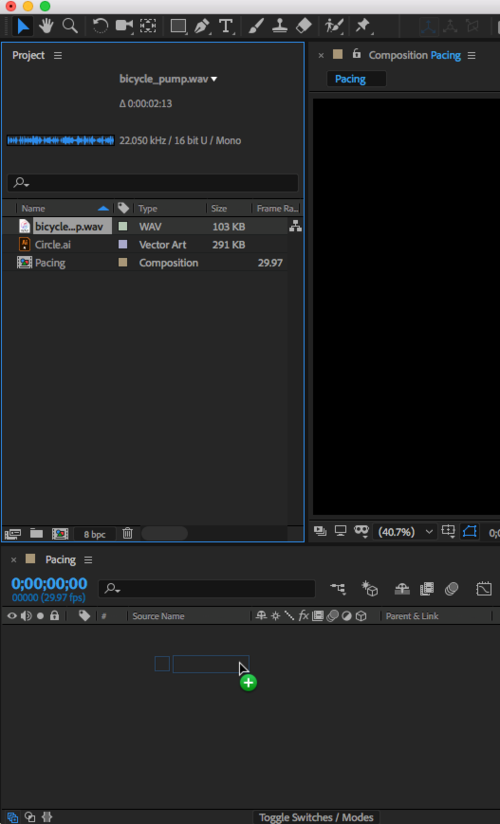
4. Drag the sound clip from the Project Panel to the Layers panel to insert it to the composition.
Exercise 2: Placing AI File, Draw Out Solid, Add Letter “O”
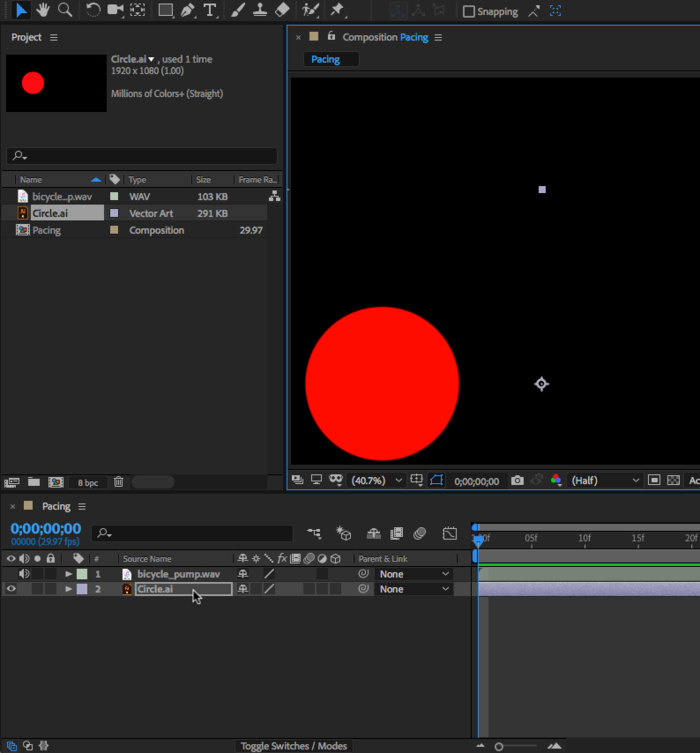
1. Move the AI File to the composition by dragging it to the layers. Move the Circle to the bottom left of the composition.
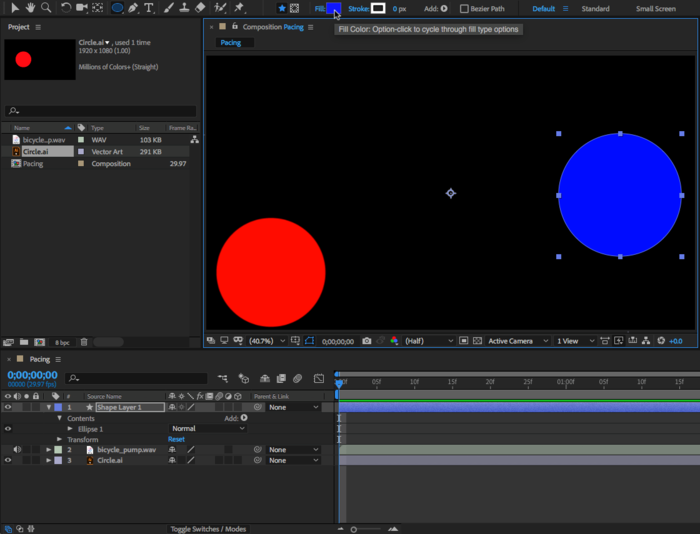
2. Draw a Solid Circle using the Ellipse Tool and move it to the right side of the composition, centered vertically. You can change the fill and stroke from the toolbar.
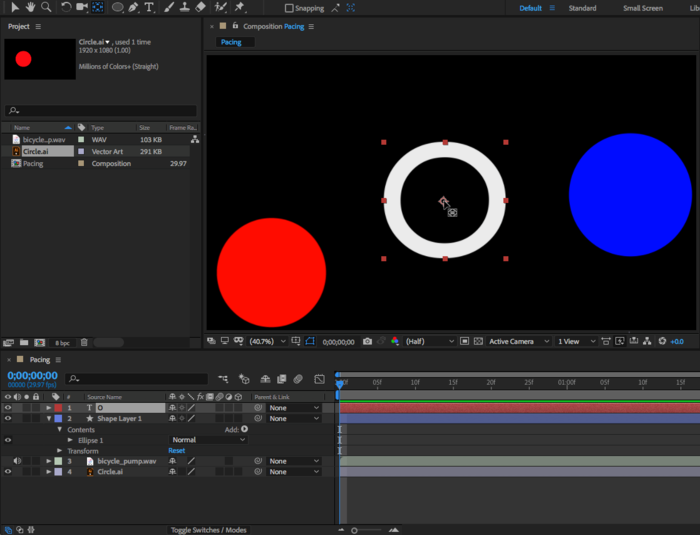
3. Select the Type Tool and add the letter “O.” Move it to the center of the composition and make sure its anchor point is in the center using the Anchor Point Tool (Y). Adjust the circles so that all three are roughly the same size.
Exercise 3: Changing Position of AI File, Change Hue of Solid
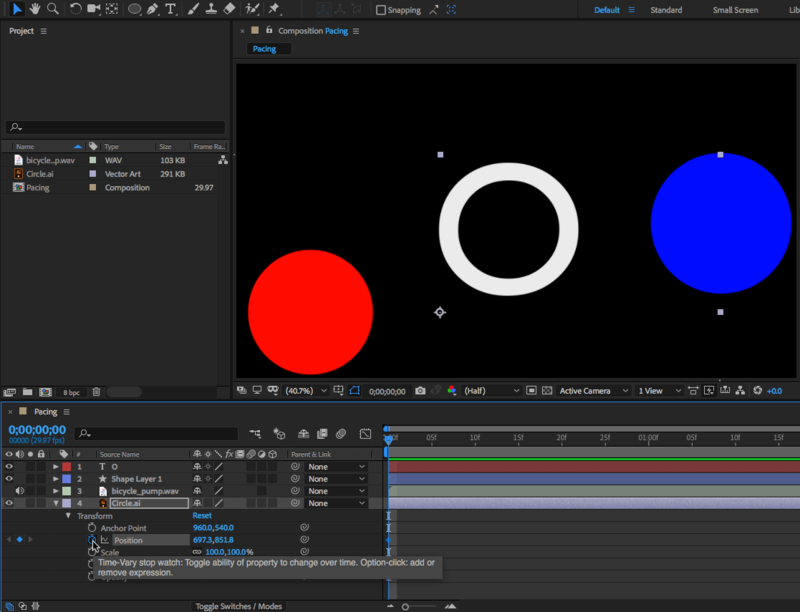
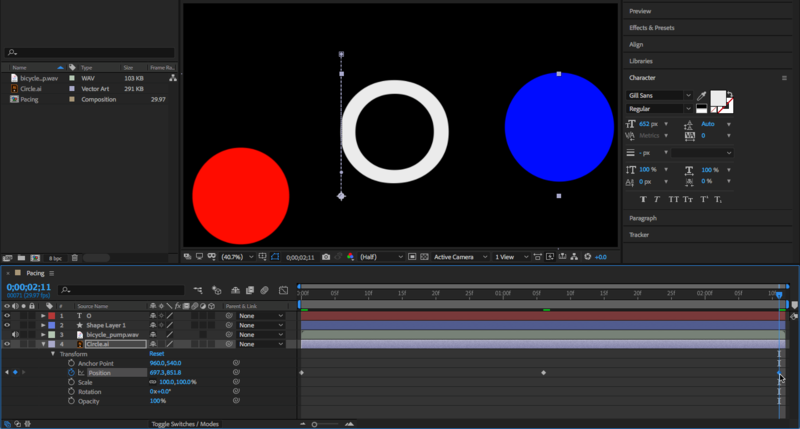
1. Create an initial keyframe so that you can change the position of the circle. In the layers panel, click the arrow next to the “Circle.ai” layer to expand the twirl down menu. Do the same for the Transform menu, and then click the stop-watch next to Position while the playhead is at the first frame.
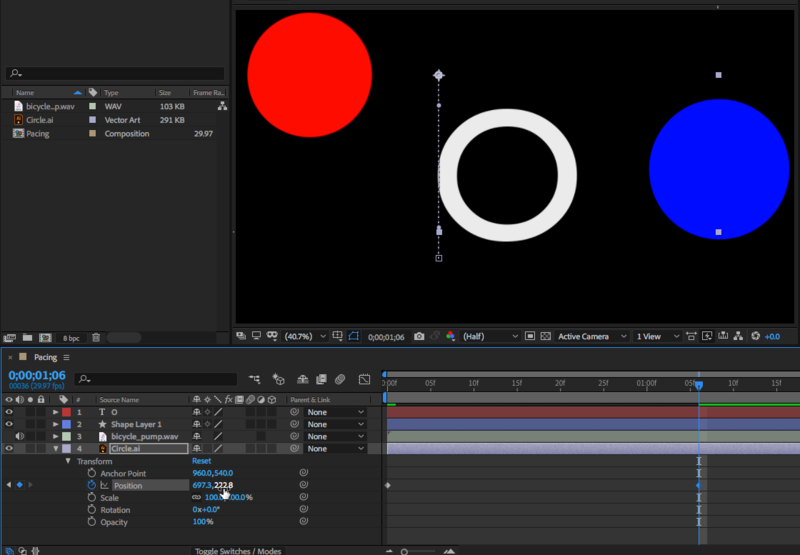
2. Move the playhead halfway through the composition so that it is exactly at 1:06 seconds. You can find the time at the bottom of the composition panel. Change the position of the circle so that it is higher than its previous position.
3. Move the playhead to the last frame. Click on the first Keyframe we made in step 1, copy it, and paste it to the last frame.
4. Press SPACE to preview.
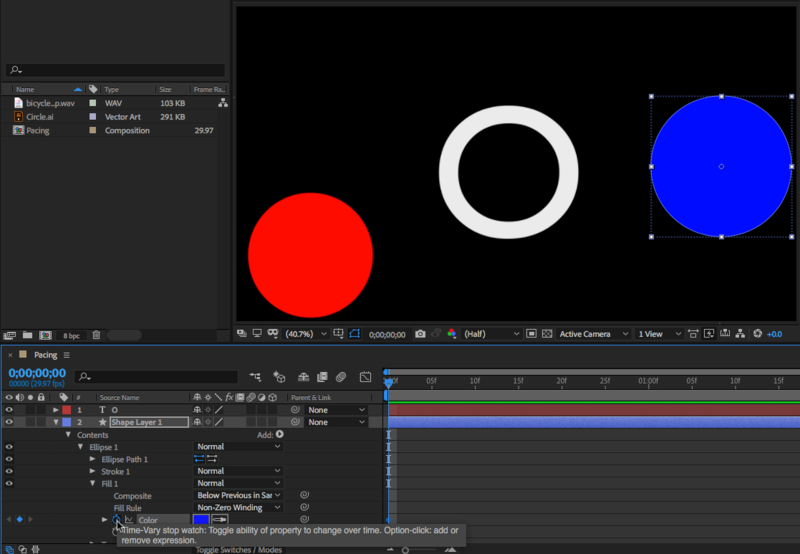
5. Select the solid shape and make a keyframe for Color (Contents > Ellipse 1 > Fill 1) at the first frame.
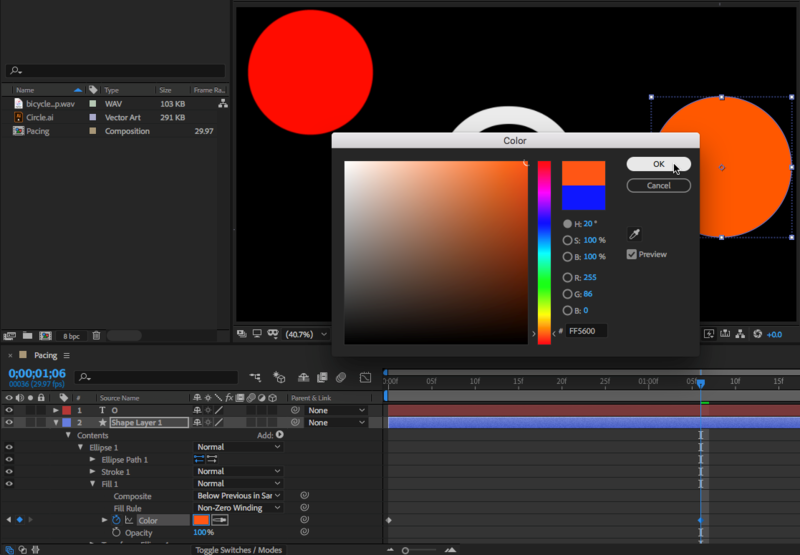
6. Move the playhead halfway (1:06) and change the Color.
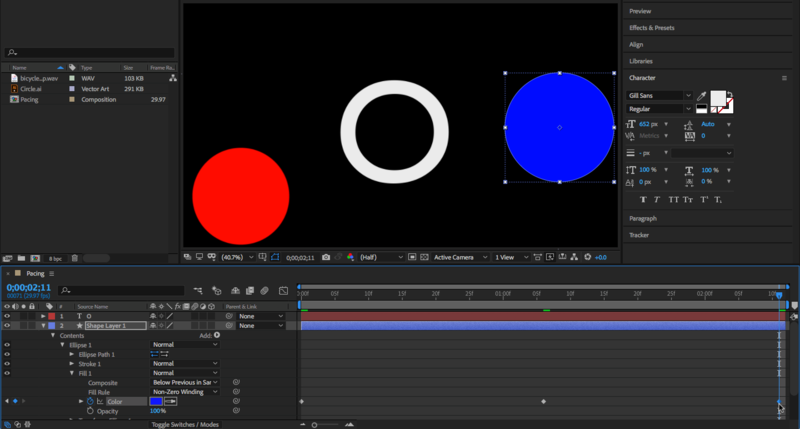
7. Go to the last frame and duplicate the first keyframe.
8. Press SPACE to preview.
Exercise 4: Change Opacity and Scale of “O”
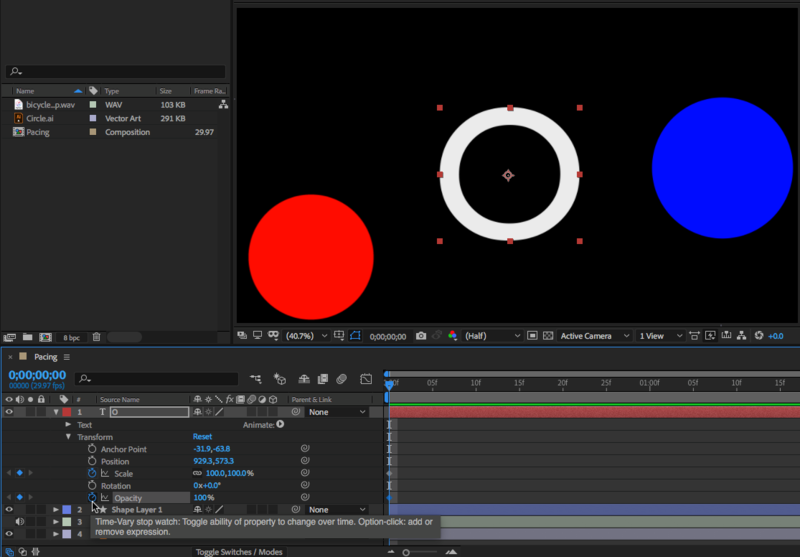
1. For the “O”, make a keyframe for scale and opacity at the first frame.
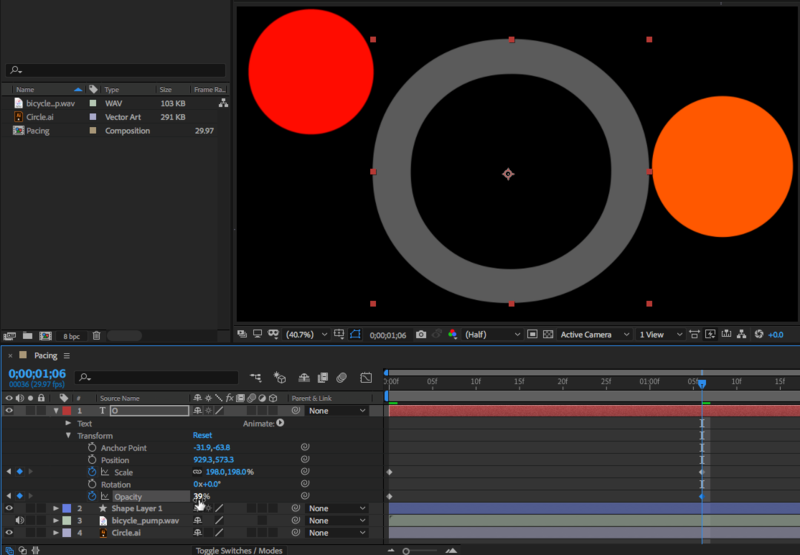
2. Move the playhead halfway so that it is at 1:06 seconds. Change the scale so it is larger but not touching the other circles. Then change the Opacity to 0%.
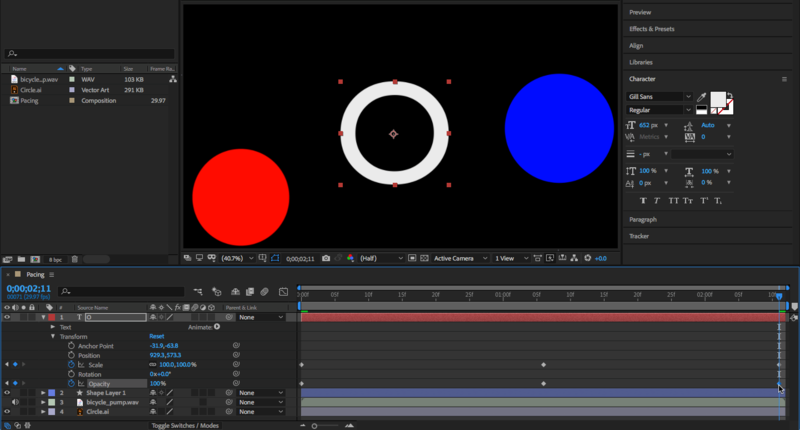
3. Go to the last frame and copy the key frames from the first frame to the last frame.
4. Press SPACE to preview.
Exercise 5: Exporting and Rendering
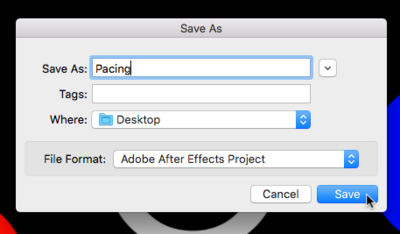
1. Save the composition by selecting File > Save As > Save As… and name the project “Pacing.”
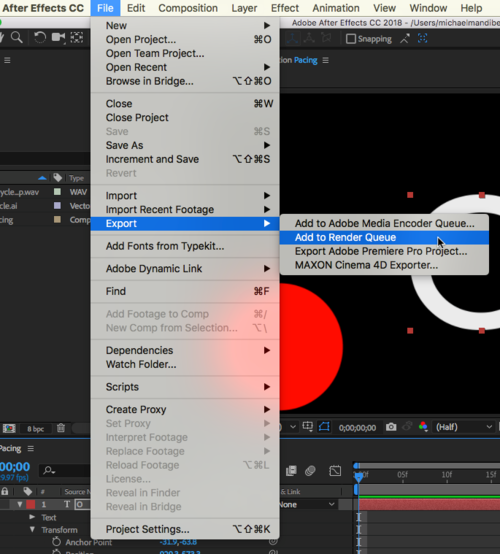
2. Then Export by selecting File > Export > Add to Render Queue.
3. Change the value of “Output To:” by selecting the blue value and choosing where the composition will be exported to. Click save.
4. Click on Render on the right. This will export and render the video to an MOV file.
Exercise 6: Looping
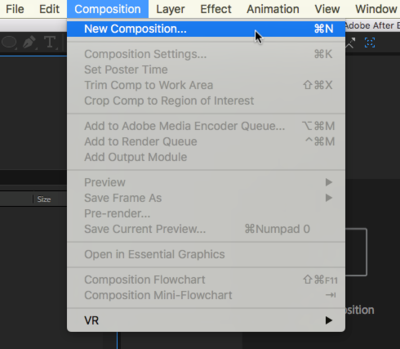
1. Make a new project by selecting Composition > New Composition or by using the shortcut, CMD + N.
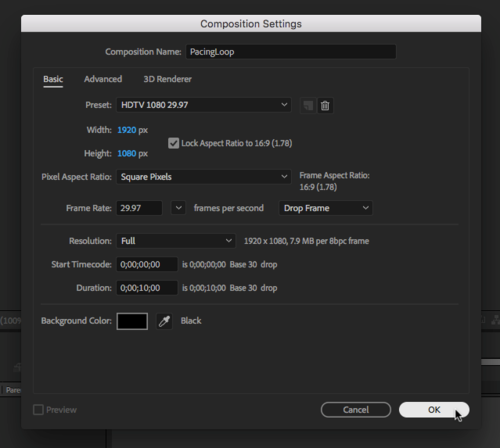
2. In the Composition Settings Window, name the new composition “PacingLoop” and make the duration 10 seconds (0:00:10:00). Click OK
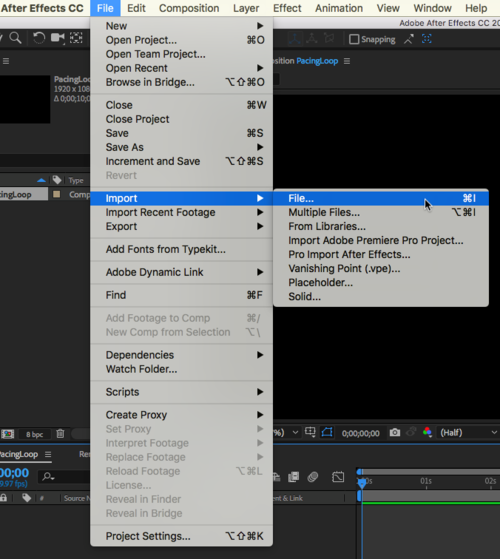
3. Select File > Import > File… and select the Pacing.mov file that we created earlier.
4. Click and drag Pacing.mov to the layers panel and press SPACE to preview. As you can see, the Pacing file only lasts for 2 seconds of our 10 seconds.
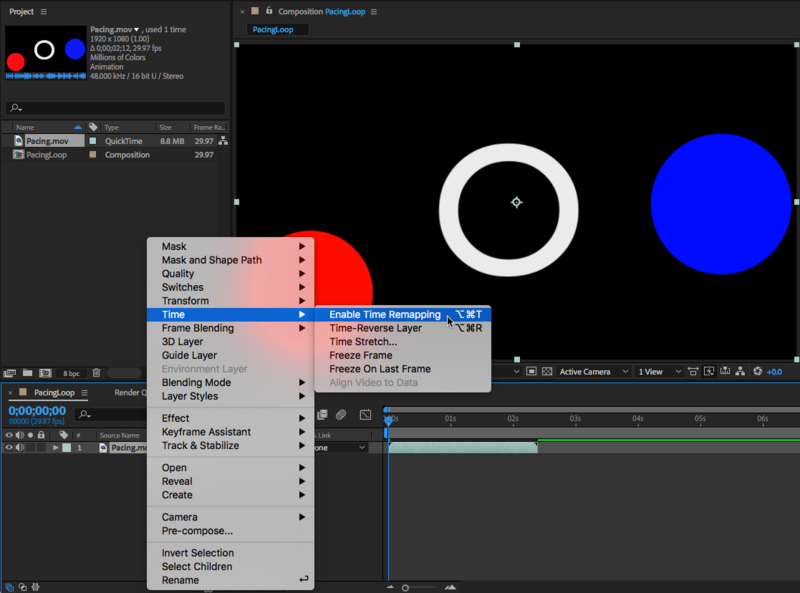
5. Right click the Pacing.mov layer and select Time > Enable Time Remapping. This will create a property with a keyframe under the layer.
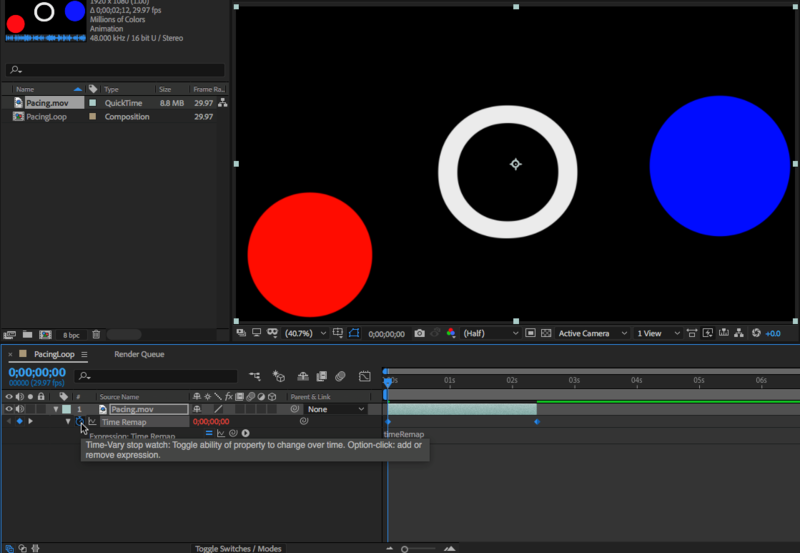
6. Option + Click the keyframe icon to create an expression. Expressions are bits of code that tell After Effects details about the property, in this case Time Remap.
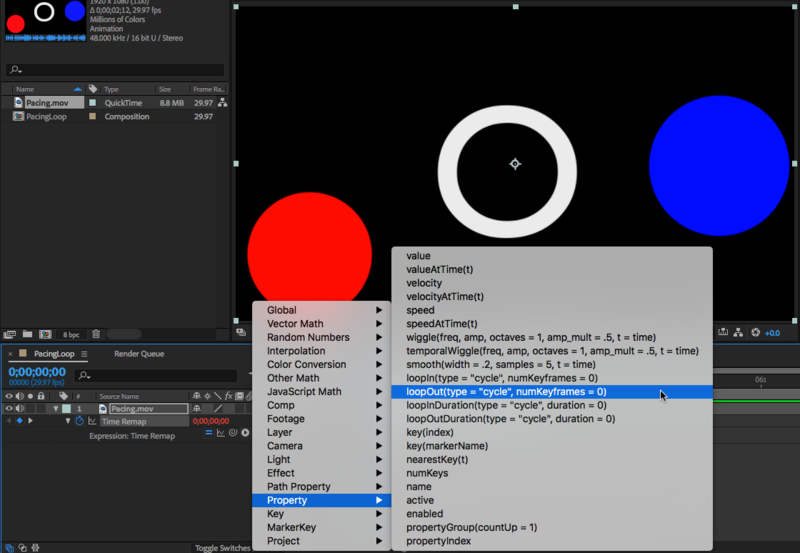
7. Click on the Expression Language Menu, which is the circle with the triangle within the expression layer.
8. From the Expression Language Menu. Select Property > loopOut(type = “cycle”, numKeyframes = 0)
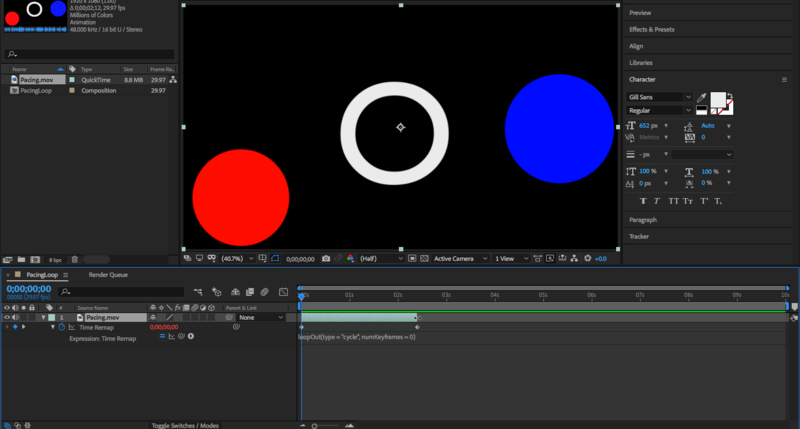
9. Now drag the end of the Pacing.mov layer to the end of the composition. This will tell After Effects to loop until the end of the composition.
10. Press SPACE to make check that Pacing.mov is looping for the 10 seconds. If it is, continue exporting and rendering the composition like in Exercise 5.

