Chapter 16 CS4
Download Materials for Chapter 16
Click here to download chapter 16 work files.
Chapter 16: Files and Servers
Web pages are posted to the internet through a server. Downloads from the web are loaded from the same server. A server is a computer with software installed on it that allows it to send and receive requests in the form of code. A client is a computer running software, such as a web browser, that sends requests to the server. When you click a link on the web, your computer sends a request to the server through the web browser and the server returns the requested web page.
MTAA, The Simple Net Art Diagram (1997) was made as a gesture to define net art. The art was interpreted as the idea of transmission. In other words, the art was not interpreted as necessarily residing in the code or the aesthetic results of the code. The art happens in the space between the two computers. For MTAA, what is important is the transfer of information.
Exercise 1: Defining a site in Dreamweaver
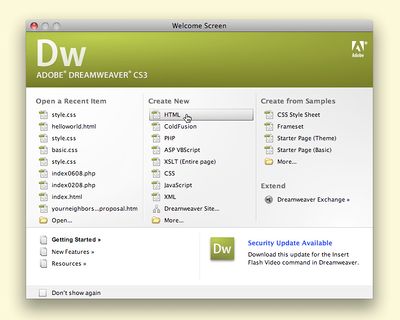
1. Choose "HTML" from the Create New menu when Dreamweaver launches. If the Welcome Screen is disabled, use File > New > Blank Page > HTML > <none>.
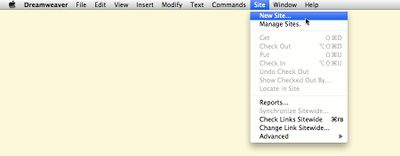
2. Click on the Site Menu > New Site.
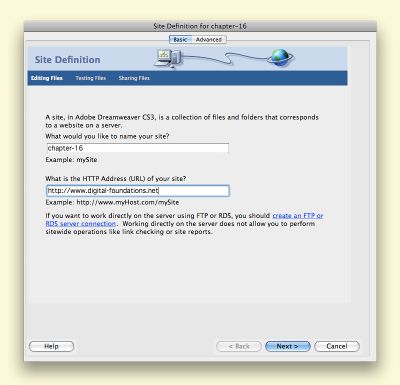
3. In the New Site dialog box, use the Basic tab at the top of the box. This will make the dialog box act like an installation wizard, guiding you through the process of defining your site. On the first screen, name your site and enter it's URL. The name of the site can be anything, but we tend to keep it simple. If you don't have a URL, you can leave this field blank. Click the Next button.
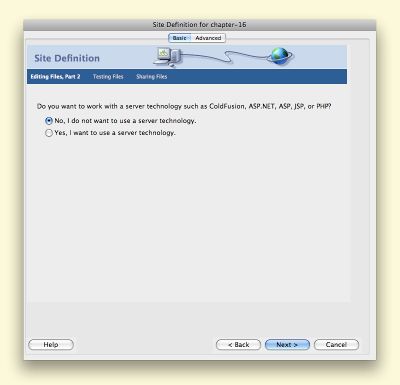
4. Select whether or not you would like to use a server technology. If you do not know what this means, leave the radio button for "No" selected. Click the Next button.
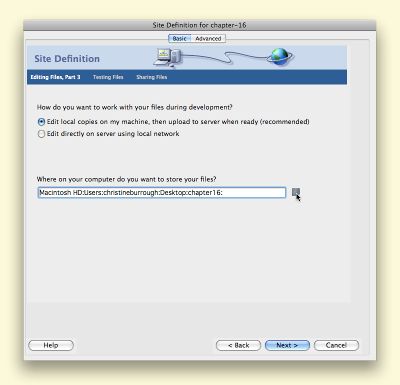
5. Check the radio button for "Edit local copies on my machine, then upload to a server when ready." It is rarely a good idea to edit directly on the server. This literally means that your pages are designed and coded offline on a local machine (your hard drive) before they are transmitted to the server. Click the folder icon at the end of the field for "Where on your computer do you want to store your files?" This will bring up a window similar to the open or save window. Choose or create a new folder that you will define as your "root" folder. This is an important concept, so read on before finally clicking Choose, followed by the Next button.
The root folder is the location where all of the web files are saved. This is important because when you are ready to upload your content to the server, you will recreate the same file structure at the root directory of the website. The root directory of the website is the location after the slash following the domain name (ie.http://www.website-name-here.com/)
Here is where metaphor can be used to understand this digital idea. You have a home that is located at a particular address. The postal service delivers your mail to that address. If you are in the kitchen or the bedroom, you are positioned in some area of the house, contained within that address, so you will receive mail delivered to the address. The root folder is your home. All of the files in your root folder are at home. Any folders you create inside the root folder are contained by the root and can be accessed like rooms in a house. Folders outside of the root folder, like locations not at your home address, are not easily accessible by the website just as the postal service will only deliver your mail to your particular address.
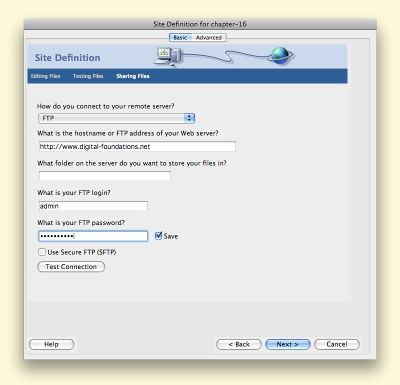
6. If you have a web domain and want to send files to the server, use the pulldown menu for "How do you connect to your remote server" to select FTP (File Transfer Protocol). If you do not have a domain name, use the pulldown menu to select "None." If you have a domain name, type in the host name (www.your-domain.com), the folder (you can leave this blank to use the root directory), your FTP login (sometimes referred to as username) and FTP password.
Click the Test Connection button to see that Dreamweaver can successfully connect to your server. If you are using this in a computer lab at a school, there is a very good chance that the lab has been set up to disallow connections through this panel. If you are unable to connect in a public location, try it again at home. Click the Next button.
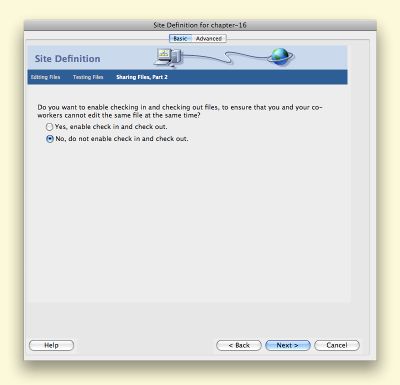
7. Do not enable check in and check out at this time as you are the only person working on your own files. Click the Next button.
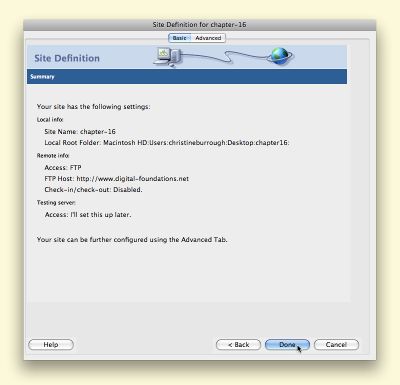
8. Click the Done button.
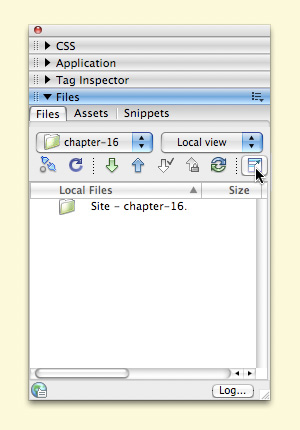
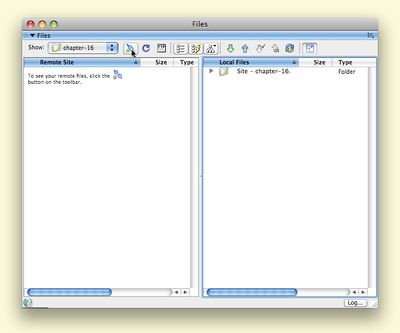
9. Look in the Files Palette to view the root folder for the site you just defined. Click on the button in the top right corner to expand the view in order to see both the local (files on your hard drive) and remote (files on the server) sites.
10. If you have a domain name and entered the log in information when you defined the site, clicking on the "Connects to remote host" button will access the server where your files are stored. If you do not have a domain name, this button will return an error message. Click the button to collapse the view so that you are only viewing the local files. If you do have access to a server, uploading files to the server so that they are published on the web is as easy as dragging the files from within a folder on the local side of this palette to a folder (called a "directory") on the remote side.
Exercise 2: File and folder management
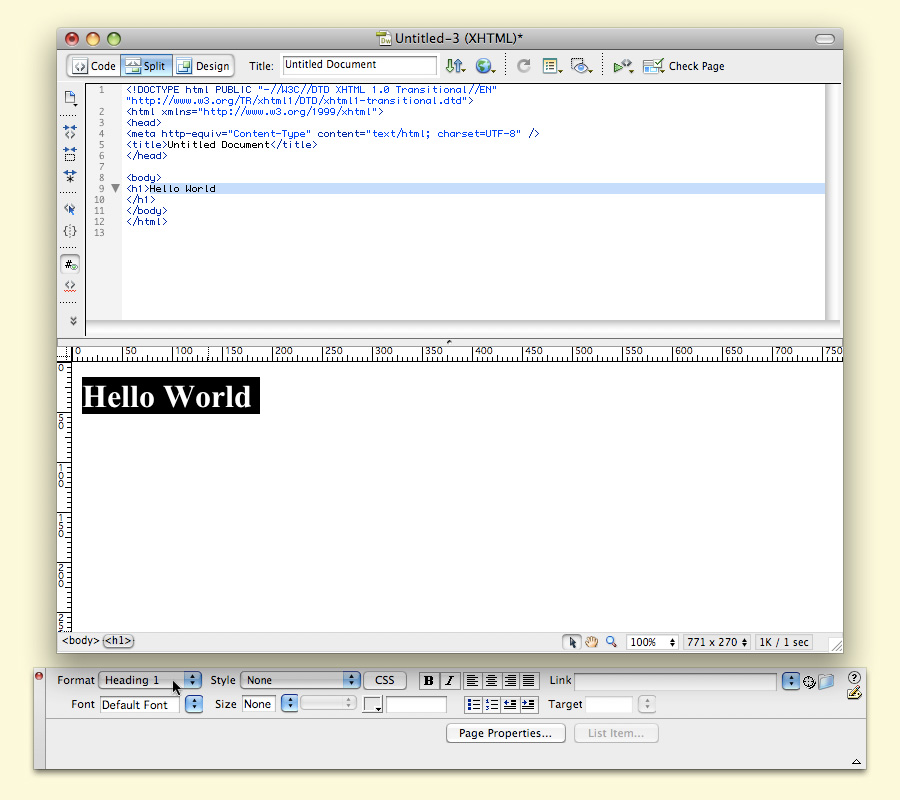
1. View the HTML document in "Split" mode. Type "Hello World" into the design view of the HTML page. Highlight the text and add the H1 tag by choosing Heading 1 from the Format Pull-down Menu in the Properties Palette. Notice that the H1 tag is added in the code.
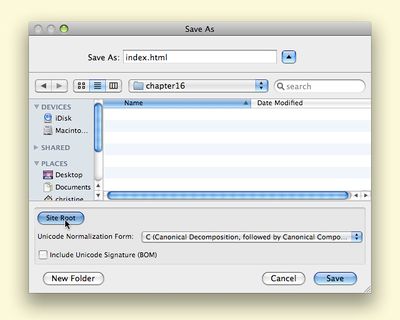
2. Use File > Save As to save the page as "index.html" in the root folder. You can save into the root folder in one-click by using the "site root" button in the Save As Dialog Box. It is essential to have a file named "index.html" (or “index.htm”) in your root directory. The HTML home page is always called “index.html” because the browser automatically knows to load “index.html” from any root directory. Any other page that you intend to display in the browser will have to be accessed by a hyperlink either from index, or from a page that came from the index.
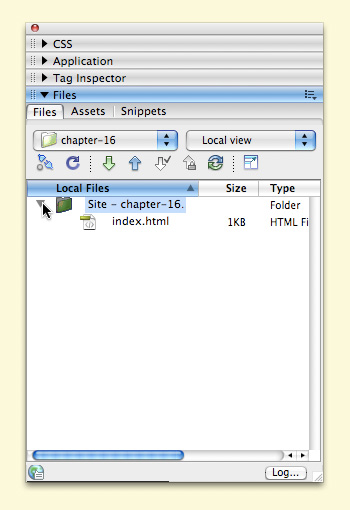
3. Expand the Site folder in the Files Palette to see the index.html file saved in the root folder.
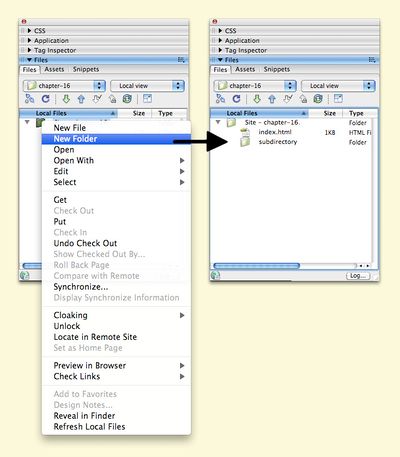
4. CTRL+click on the root folder to display the contextual menu and select New Folder. Create a new folder called "subdirectory".
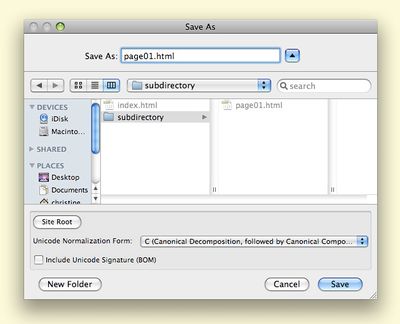
5. Make a new file with File > New > HTML > <none>. Save it as “page01.html” inside the new folder named “subdirectory.”
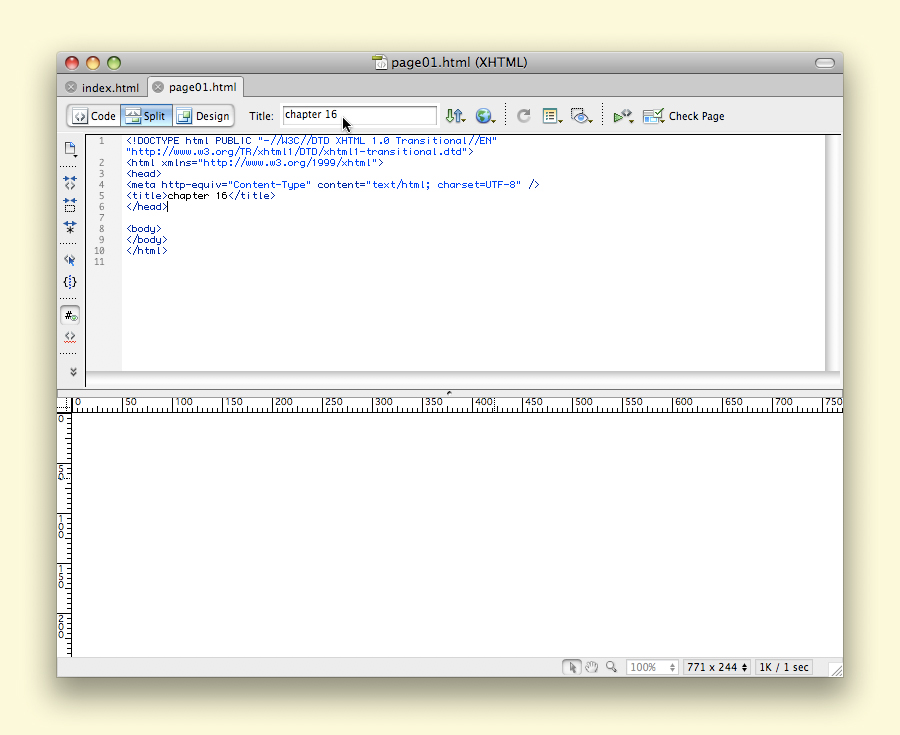
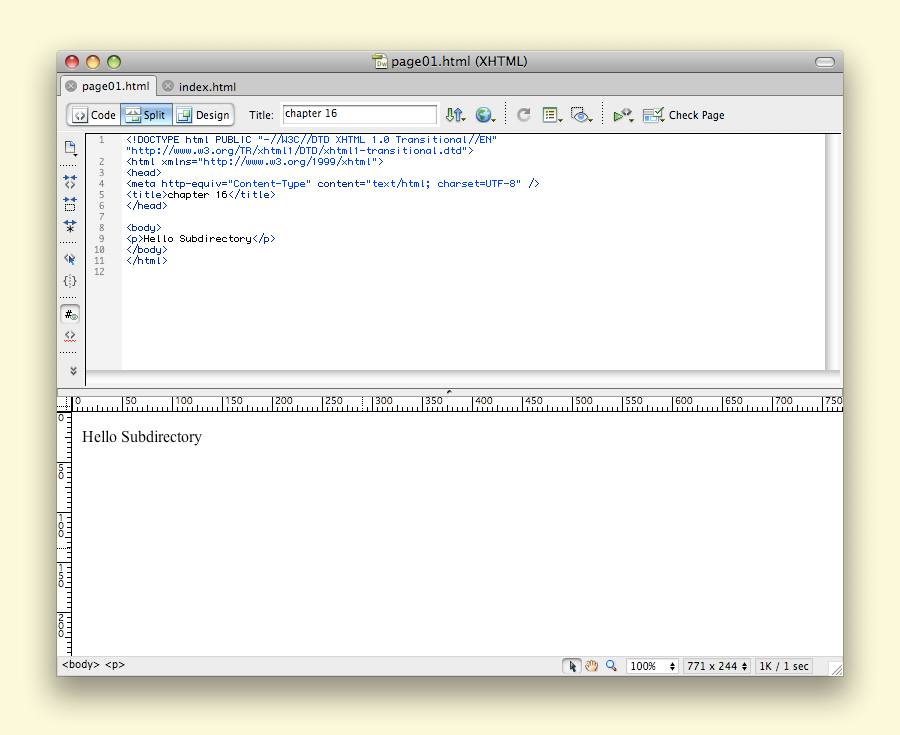
6. The new file already has code, even though we have only opened and saved the file. Look in the code portion of the Split view. At the top there is the Doc type declaration. This tells the browser the exact type of HTML that is used within the file. Next is the HTML tag followed by the HEAD tag. In the HEAD tag we will define the title of the page. The title appears at the top of the browser. Title the document "chapter 16" in the title field at the top of the document. Notice the TITLE tag inside the HEAD area of the code has been modified to reflect the change.
7. Type "Hello Subdirectory" on page01 in Design View.
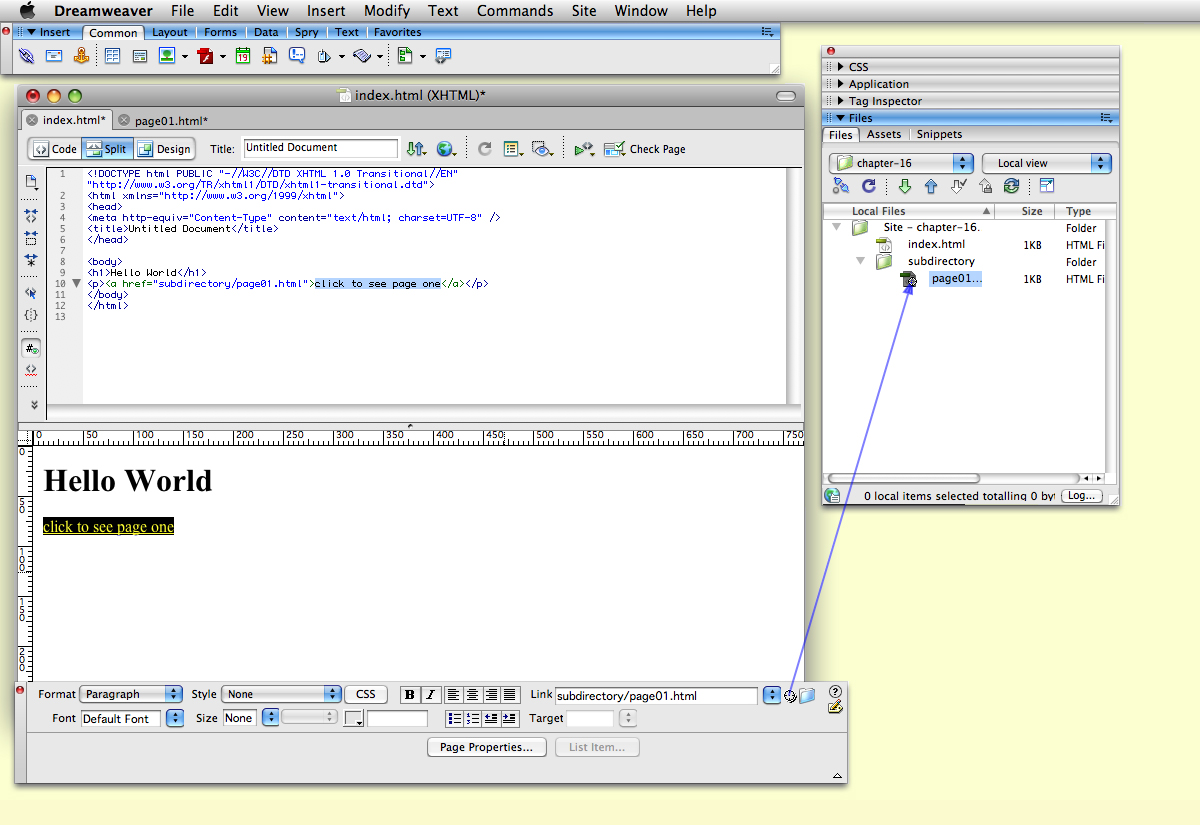
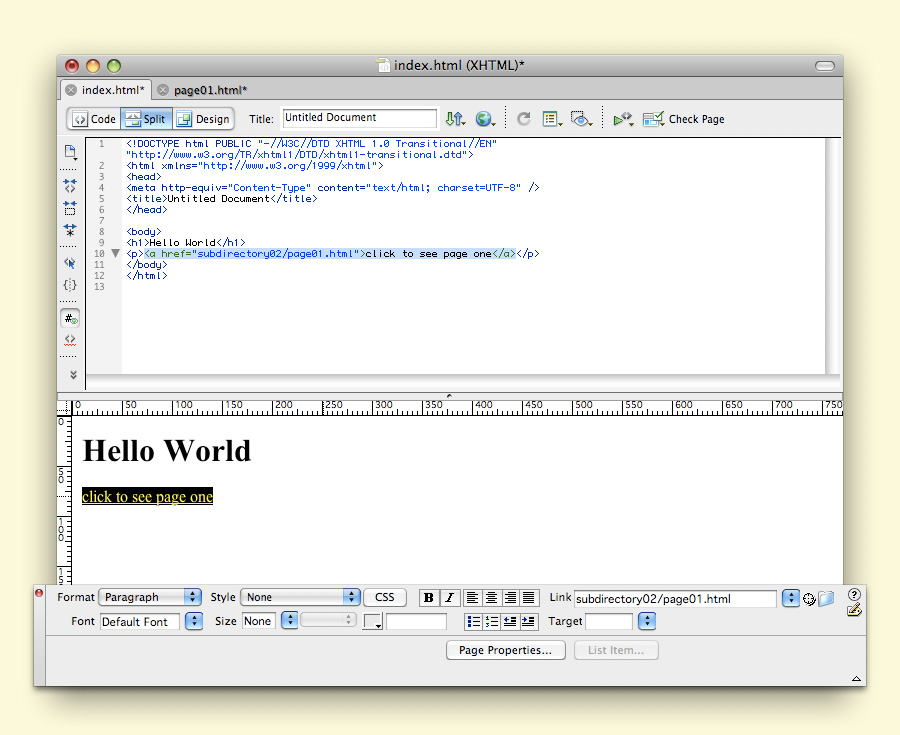
8. Go back to the first file, "index.html". If it is still open then it is one click away on a tab in the top left area of the document window. If you closed it, double-click the file "index.html" from the Files Palette. Add the text "click to see page one" in the body of the page by typing in Design View. Now we will create a link to the file "page01.html" from the index page. Select the text "click to see page one" in Design View and mouse over the target button on the far right of the Properties Palette, beyond the "link" field. Notice the tool tip "Point to File". Click on the Point to File button and drag the arrow to page01.html in the Files Palette. When you release the mouse, the link will appear in the link field and in Code View as an HREF tag. The URL for the new link is "subdirectory/page01.html". Subdirectory is the name of the folder and page01.html is the file inside the folder. Coincidentally, a subdirectory is the name of a "folder" on the server. The slash (/) is used to tell the browser to look inside a directory.
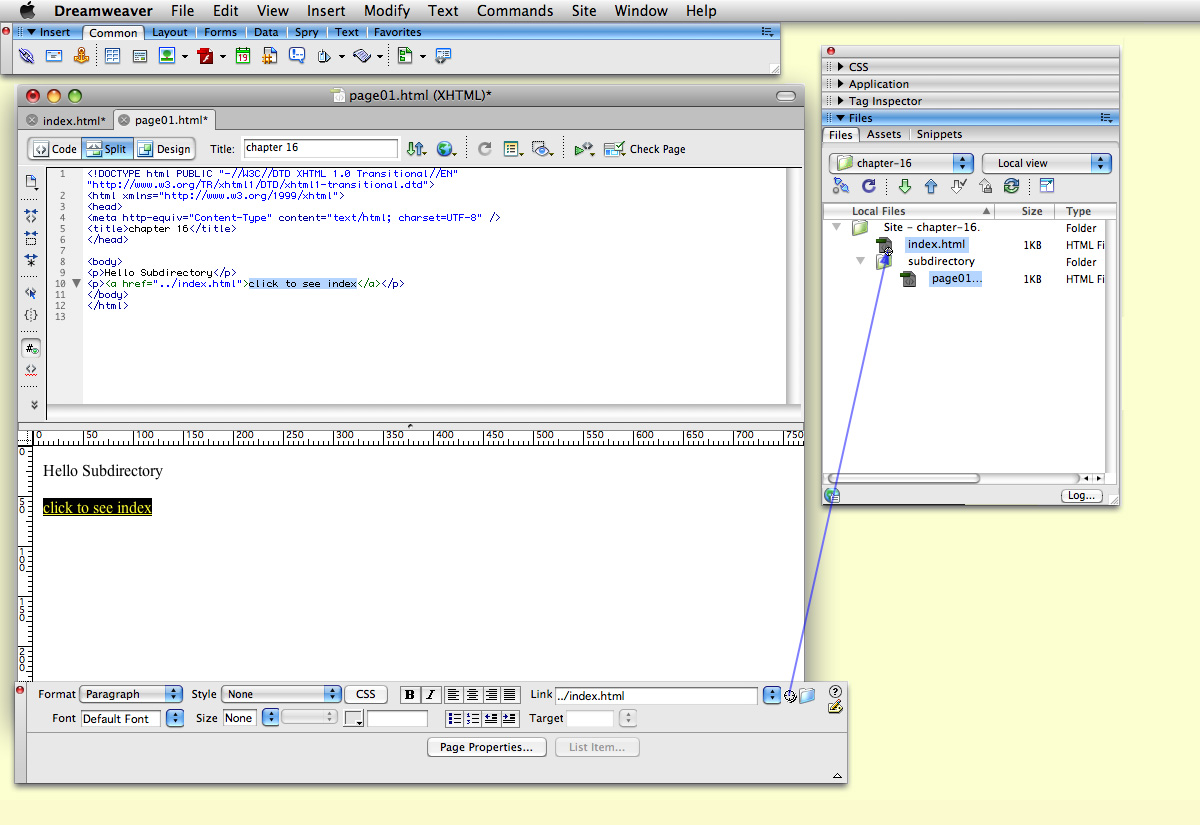
9. Repeat the directions in the previous step on “page01.html” to create a link from page01 back to index. Make the link read, "click to see index" instead of "click to see page01." Notice the URL for the new link is "../index.html." The syntax, "../" informs the browser to move up one directory in order to find the file. On your hard drive, this means look inside the previous folder.
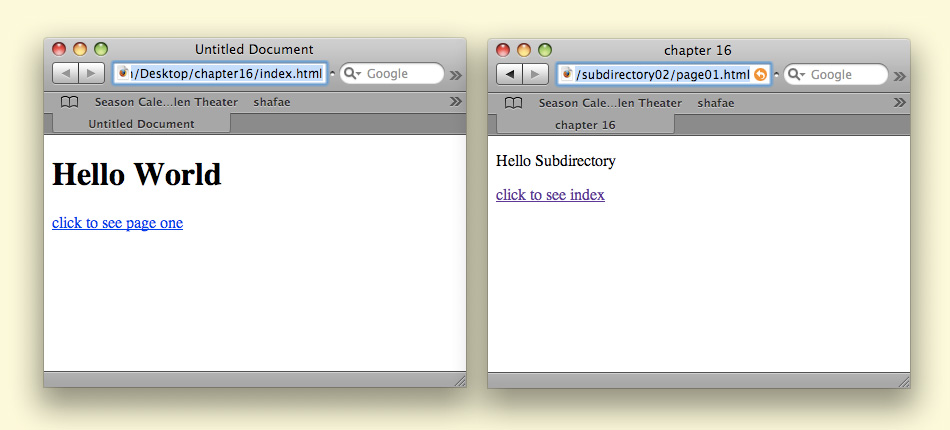
10. Remember to save all of your changes in Dreamweaver in order to see the links working in the browser. You can click to each page individually and use File > Save or use File > Save All to save all of the files that are open. Save everything and test your work in a browser. Open "index.html" in a browser. Use File > Open File or drag the index.html file to the page area of a web browser. Notice as you click between the two pages, the location area of the Navigation Bar (where you type or read a URL) displays the names for each file. IMAGE CAPTION: Notice for each of the browser windows that the two pages have many differences. Index is an untitled page, while page01 has the title, “Chapter 16.” Also notice the difference in the leading on the web page as a result of the H1 tag applied to Hello World on the index page.
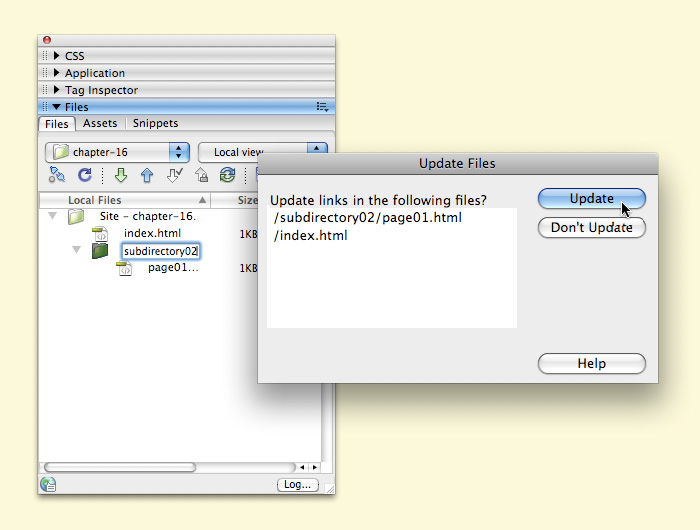
11. Finally, it is a good idea for beginning web developers to commit to the names applied to files and folders. However, if you have to rename a folder or a file, Dreamweaver will prompt you to update the files that are referencing it as a link. If you click yes, Dreamweaver will update the code in all of your files to reflect the name change. We'll demonstrate this by changing the name of the folder, "subdirectory" to "subdirectory02." As soon as the name is changed (click on the word, "subdirectory," pause, type in the numbers at the end of the word, then hit the Return key) click the Yes button in the Dreamweaver Update Files warning.
11. Review the page "index.html." Notice the path to the link in the subdirectory folder has now been changed to "subdirectory02."
